Wedding Day Emergency Hair Kit: Essentials and Quick Fixes
Pack a practical wedding day emergency hair kit with matching pins, trial-tested products and simple fixes for loose updos, flyaways and veil removal.
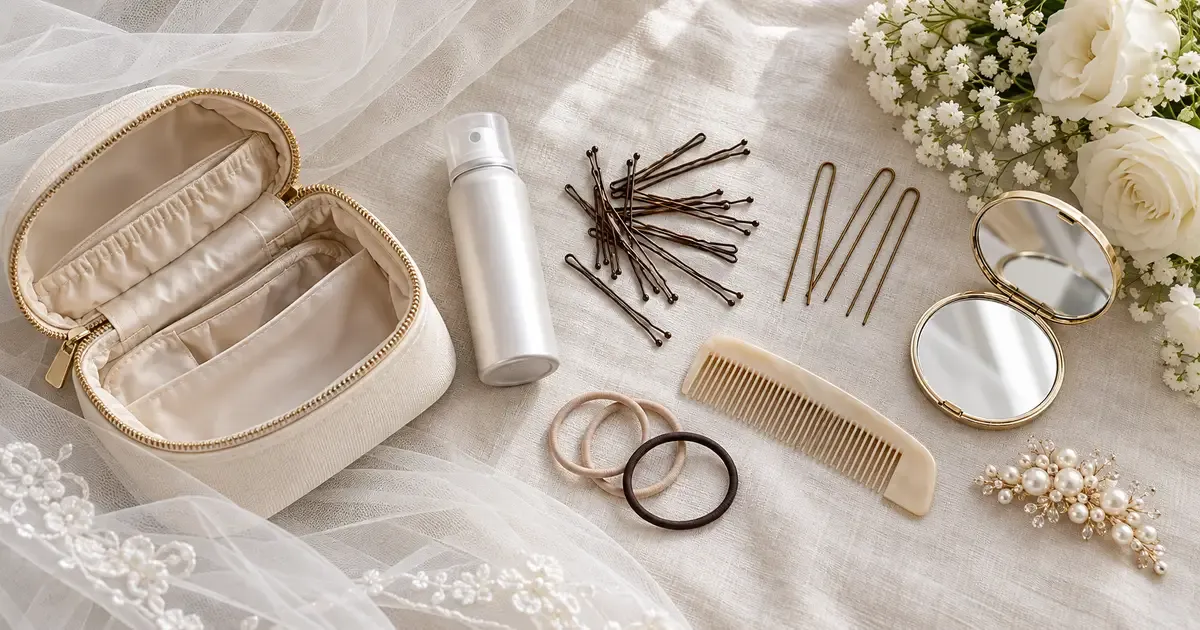
A wedding day emergency hair kit is a small set of supplies for minor touch-ups between styling and the end of your reception. Pack matching pins, spare elastics, trial-tested hairspray, a small mirror and a comb suited to your hairstyle. Add other products only if your stylist recommends them.
The aim is to secure a loose section or smooth a few flyaways without taking apart the hairstyle. More products do not necessarily mean a better kit: unfamiliar serum can flatten fine hair, while brushing a curled style can change its shape.
Key Takeaways
- Start with matching pins, suitable elastics, trial-tested hairspray, a mirror and a style-appropriate comb.
- Treat dry shampoo, serum, texturizing products and heat tools as optional, hairstyle-specific extras.
- Ask your stylist to demonstrate pin placement, veil removal and one simple backup plan at the trial.
- Some anti-humidity treatments need damp hair and blow-drying; check instructions before packing them for touch-ups.
- Keep the kit with a named helper who knows where it is and which adjustments they can make.
What Should Be in a Wedding Day Emergency Hair Kit?
A wedding day emergency hair kit should contain matching bobby pins, open hairpins, spare elastics, trial-tested hairspray, a small mirror and a comb suited to your hairstyle. Keep them in a zippered pouch. Add serum, dry shampoo or heat tools only if your stylist recommends them for your chosen look.
| Item | What it helps with | What to check before packing |
|---|---|---|
| Matching bobby pins | Securing small loose sections | Match the color and size your stylist uses. |
| Open U-shaped hairpins | Supporting buns and twists | Ask your stylist to demonstrate placement. |
| Spare hair elastics | Replacing a broken tie or making a planned backup style | Choose the type used in your style; tiny clear elastics are not suitable for every ponytail. |
| Travel-size hairspray | Light finishing touch-ups | Test the hold and finish during your trial. |
| Small mirror | Checking the front and sides | Have your helper check the back. |
| Small comb or brush | Smoothing the areas your stylist identifies | Avoid brushing through set curls or opening backcombed sections. |
| Zippered pouch | Keeping everything together | Make sure your helper can find it without returning to the getting-ready room. |
Keep pins in a small container and close product caps firmly. If your stylist leaves spare pins, pack those first: they already match the style’s construction.
For help choosing the look before assembling the kit, see our guide to wedding hairstyles for every face shape.
Choose Products for Your Hairstyle
Hairspray: the basic finishing product
Pack a small bottle of the hairspray used successfully at your trial, or a substitute your stylist approves. Follow its application distance and drying instructions. Extra-strong hold is not automatically the right choice for soft waves or touchable curls.
The linked TRESemmé Extra Hold hairspray is one option to discuss, but check the selected bottle size: the listing may be a full-size product rather than a travel bottle.
Dry shampoo: optional for visible root oil
Dry shampoo can help with oily roots in accessible sections of loose hair. Test it on your hair color beforehand and follow the label’s application and removal instructions. Do not assume an invisible finish, especially on dark hair.
Skip it if working it through the roots would disturb your updo. Oil absorption and restoring a fallen curl are different jobs; dry shampoo does not reset a hairstyle on its own.
Smoothing serum: optional for selected flyaways
A small amount of smoothing serum may help isolated frizz if it suited your hair at the trial. Spread a tiny amount between your fingertips and lightly smooth the affected section. Avoid saturating the roots or repeatedly adding layers.
For fine hair, ask whether your existing finishing spray is enough. For curls, use a product and application technique that preserve the curl pattern.
Texturizing products: optional for accessible volume
Texturizing powder or spray belongs in the kit only if your stylist shows your helper where and how to apply it. Adding powder to an already backcombed crown can make later adjustments harder.
Do not pack both dry shampoo and a texturizing product by default. Choose what solves a likely problem for your specific look.
Anti-humidity treatments: check whether they are preparation products
Not every anti-frizz spray works as a quick finishing mist. For example, Color Wow Dream Coat Supernatural Spray requires damp, towel-dried hair and blow-drying with tension, according to the manufacturer’s instructions. Here, tension means using a brush to hold a section of hair taut while blow-drying it, following the product instructions. Discuss this treatment as part of pre-wedding styling rather than spraying it onto a finished updo at the reception.
For on-the-day frizz, pack a finishing product your stylist has tested on your hairstyle. Avoid adding several anti-humidity products without checking their compatibility and intended use.
Tools, Pins and Accessories
Bobby pins and open hairpins have different jobs
Bobby pins have two close arms that grip small sections of hair. Open hairpins are usually U-shaped and can support buns or twists when placed correctly. Pack the types your stylist actually uses rather than relying on a generic mixed set of hair pins.
Ask your stylist to demonstrate the angle, direction and anchor point for your hairstyle. An anchor point is a secure part of the style, such as the base of a bun, where a pin can grip without pulling the updo apart. Have your stylist show your helper the right spot rather than guessing. The right pin placement depends on the section you need to secure. Do not force a pin toward the scalp or pile on crossed pins. Both can cause discomfort. A pin should feel secure without poking.
Choose a comb or brush you can use without dismantling the style
For a smooth surface section, your stylist may recommend a small comb or travel brush. For curls, fingers or a wide-tooth comb may be more appropriate. Confirm which areas can be touched and which should be left alone.
Pack sectioning clips only if you have a planned touch-up that needs them. Re-teasing a finished crown is best left to someone familiar with its construction.
Bring a practical accessory backup
A spare decorative pin or a small clip can help if an accessory is lost or damaged. Check that it works with your hairstyle and can be attached using the method shown at the trial. Our guide to bridal hair accessories can help you compare options beforehand.
Keep a sewing kit with your general wedding emergency supplies if needed, but do not make stitching accessories into hair a DIY rescue step. Leave that technique to a trained stylist.
Heat tools need a separate plan
A mini curling wand or flat iron is optional. Choose a tool suited to your hair or extensions. Make sure your helper knows how to use it. Check for a suitable outlet and a heat-safe place to set it down.
Hair must be fully dry before you use a conventional hot tool. Follow the heat-protectant directions. If the product needs time to dry, wait before applying heat. Do not mist hair with water and immediately curl it, or heat a section coated with fresh hairspray. The American Academy of Dermatology recommends using flat irons on dry hair at low or medium heat.
If those conditions cannot be met, use the heat-free fix agreed at your trial, such as pinning back a fallen face-framing piece.
Common Wedding Hair Emergencies and Quick Fixes
| Problem | First response | When to stop |
|---|---|---|
| A curl has dropped | Gently reshape with fingers or pin it into the planned backup position. | If restoring it needs heat you cannot use as instructed. |
| Part of an updo is slipping | Support the section and reinforce the demonstrated anchor with a matching pin. | If the main structure is coming loose or you cannot identify the anchor. |
| Flyaways appear | Apply a small amount of your tested finishing product as directed. | If extra product is flattening the style or leaving residue. |
| Crown volume looks compressed | Ask your helper to gently lift only an accessible section shown at the trial. | If the fix requires pulling out structural pins or opening the backcombing. |
| An accessory moves | Support it and secure it using the attachment method you practiced. | If its comb or clip is tangled or pulling painfully. |
How Do You Fix Wedding Hair That Comes Loose?
For a slipping section of your hairstyle, use the pinning method shown at your trial:
- Check the loose section in a mirror and have your helper check the back.
- Have your helper support the slipping section.
- Leave the main support pins in place.
- Add a matching pin at the anchor your stylist demonstrated.
- Check that the section holds and the pin does not poke.
- If it keeps slipping, use only the backup fix you practiced with your stylist.
For a fallen curl, gently reshape it with your fingers. If it will not hold, pin it back as practiced at your trial. Avoid adding more and more spray.
If the updo is unraveling, contact your stylist if they are available. Otherwise, use only a backup change your helper has practiced. Our bridal updo guide offers styles to discuss before the wedding.
Flyaways and frizz
Use the smallest amount of your trial-tested product needed for the affected area, following its label. Smooth lightly rather than rubbing or brushing repeatedly. If the hair looks coated, stop adding product.
Do not spray hairspray onto your hands unless the product instructions allow that application. A small clean brush may help with surface flyaways if your stylist has demonstrated the technique.
Flattened crown
Ask your helper to check whether an accessory or veil has compressed the surface. Gently lift only the section your stylist identified as safe to adjust. Avoid massaging powder into an anchored crown or pushing a teasing comb beneath the style without knowing where its pins sit.
Loose accessories and veil removal
Before removing a veil, identify both the comb and any additional pins holding it. Have your helper support the hairstyle. Remove only the pins holding the veil. Slide the comb out in the direction shown at the trial. Stop if it catches. Pulling can loosen the hairstyle.
Check the back afterward and smooth or reinforce only the affected section. Keep the veil in its own bag so its comb does not snag other items in the kit.
Who Should Carry the Bridal Hair Kit?
Ask your maid of honor, another trusted attendant or your wedding planner to carry the bridal hair kit. Choose one person who can stay nearby and knows the touch-ups practiced at your trial. Tell a second person where the pouch is, and keep it accessible during the ceremony and reception.
A compact zippered pouch is enough; a clear one makes items easier to spot. Keep brief instructions on a paper card or phone note. There is no need for a separate label maker.
Avoid leaving the pouch in a room you cannot access after the ceremony. Keep larger tools with the getting-ready supplies unless you have a plan to use them later.
At the trial, ask your stylist:
- Which products should I use for touch-ups, and which should I avoid?
- Which pins hold the main structure, and where can my helper add a spare?
- How should the veil or hair accessory be removed?
- What is the simplest backup if a curl drops or the weather changes?
- Do my extensions or accessories need different product or heat instructions?
Take front, side and back photos with permission. Have your helper practice the permitted adjustment so the photos support a technique they already understand.
When Should You Touch Up Wedding Hair?
Check your wedding hair before portraits, after the ceremony or veil removal, and during a reception break. Make small touch-ups only where needed: secure a loose section, smooth a flyaway or adjust an accessory using the method practiced at your trial. You do not need to reapply every product each time.
- Before portraits: check visible flyaways, loose sections and accessory placement.
- After the ceremony: check the back, particularly if removing a veil.
- During a reception break: check comfort and any sections loosened by dancing.
Use these natural pauses for a quick check, then return to the celebration.
Adapt the Kit to Your Wedding
Outdoor or beach weddings
Discuss wind and humidity at the trial. Secure accessory placement and a manageable style matter more than adding layers of product throughout the day. Keep a tested finishing product accessible and agree on a simple way to secure loose face-framing sections.
Destination weddings
Choose products suited to the destination’s climate. Before travel, check the current baggage rules for liquids and aerosols. For heat tools, check the voltage and the venue’s sockets. A plug adapter alone may not be enough.
All-day celebrations
If you want a reception hairstyle change, plan it with your stylist. Ask who will make the change, how long it will take and whether removing pins will release the whole updo. Keep any extra accessories or tools for that change together.
Final Packing Check
Before leaving the getting-ready room, check the pins and products in your kit. Make sure they suit your finished hairstyle. Confirm that your helper knows the practiced fixes and has the pouch ready to take with you.
A useful wedding day emergency hair kit supports small, practiced fixes. It does not need every styling product: it needs the right few items, clear instructions and someone who can find them when a section comes loose.
Frequently Asked Questions
What should be in a wedding day emergency hair kit?
Start with matching bobby pins and open hairpins, spare elastics suitable for your style, trial-tested hairspray, a small mirror and a comb your stylist recommends. Add other products only if you have practiced using them on your chosen hairstyle.
How can I touch up a complex bridal updo?
Ask your stylist to show your helper which pins anchor the updo and which loose sections can be adjusted. Take photos from several angles. Support a slipping section and add a pin as demonstrated. Leave the main support pins in place. Avoid rebuilding the style yourself.
What should I do if humidity causes frizz?
Use a finishing product tested during your hair trial. Apply a small amount to the affected section as directed on its label. Some anti-humidity treatments require damp hair and blow-drying, so they belong in preparation rather than reception touch-ups.
Can I use a curling wand or flat iron for wedding-day touch-ups?
Ask your stylist which tool suits your hair or extensions. Use it only on fully dry hair. Follow the tool and heat-protectant instructions, including any drying step. Avoid heating sections coated with fresh styling spray.
Should I plan a backup wedding hairstyle?
Discuss a manageable backup with your stylist at the trial. Ask whether it requires professional help and practice any change your attendant will make. A secure bun or ponytail may be an option, but do not assume an elaborate updo can be converted without taking it apart.

Bridal by Bentley
Wedding Editorial
Bridal by Bentley publishes wedding inspiration and practical planning guides to help couples compare options and prepare for their celebrations.